How to Starch a Shirt: A Step-by-Step Guide
Muhammad AbubakarStarching a shirt is a simple yet effective way to give it a crisp, polished look. Starching is the process of adding a stiffening agent to fabric to make it more rigid and less prone to wrinkling.
While starching is commonly associated with dress shirts, it can be used on any type of clothing made from natural fibers such as cotton, linen, and silk.
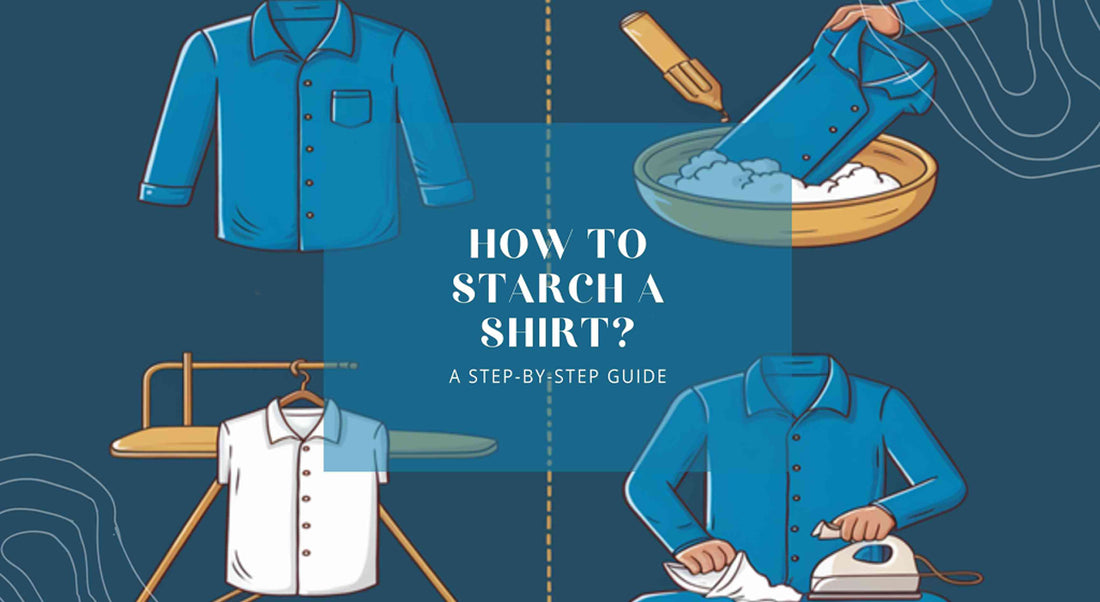
To starch a shirt, you will need to prepare the fabric, apply the starch, and then iron the shirt.
There are several different methods for starching a shirt, including using liquid starch, spray starch, or homemade starch solution.
Each method has its own advantages and disadvantages, so it is important to choose the one that works best for your needs.
Key Takeaways
- Starching is the process of adding a stiffening agent to fabric to make it more rigid and less prone to wrinkling.
- There are several different methods for starching a shirt, including using liquid starch, spray starch, or homemade starch solution.
- To achieve the best results, it is important to choose the right starching method for your needs and to follow the proper preparation and ironing techniques.

Understanding Starch and Its Purpose
Starching is a process that involves adding stiffness to fabrics, specifically shirts. Starch is a naturally occurring substance that is derived from corn, wheat, or potatoes. It is used to provide a crisp and polished appearance to clothing, particularly dress shirts.
Types of Starch
There are different types of starch available in the market, including liquid starch, powdered starch, and starch mixture. Liquid starch is a pre-mixed solution that can be directly applied to the fabric. Powdered starch requires mixing with water before use, and starch mixture is a combination of both liquid and powdered starch.
Benefits of Starching a Shirt
Starching offers several benefits to a shirt, including a crisp and polished appearance, wrinkle resistance, and easier ironing.
Starched shirts are less likely to wrinkle, making them ideal for formal occasions or for those who want to maintain a professional look throughout the day.
Additionally, starched shirts are easier to iron, as the starch provides a smooth surface for the iron to glide over.
Cornstarch is a common ingredient used in homemade starch solutions. It is mixed with water to create a milky paste that can be applied to the fabric.
This solution is an affordable and effective alternative to store-bought starch. However, it is important to note that over-starching a shirt can cause the fabric to become stiff and uncomfortable to wear.
In conclusion, understanding the purpose of starch and its benefits can help you achieve a polished and professional look.
By choosing the right type of starch and using it correctly, you can maintain the appearance of your dress shirts and keep them looking their best.

Preparation for Starching
Before starting the process of starching a shirt, it is important to prepare the necessary supplies and the shirt itself. This section will cover the key steps needed to ensure a successful starching process.
Selecting the Right Starch
There are different types of starch available in the market, such as cornstarch, potato starch, and rice starch.
Cornstarch is the most commonly used starch for laundry purposes. It is inexpensive and readily available in most grocery stores. However, if you have allergies to corn, you can use potato or rice starch instead.
Gathering Necessary Supplies
To starch a shirt, you will need the following supplies:
- Starch
- Water
- Spray bottle
- Sink or basin
- Iron
- Ironing board
It is important to note that distilled water is preferable to tap water as it has fewer minerals and impurities that can affect the starching process.
Preparing the Shirt and Starch Mixture
Before starching the shirt, it is important to wash and dry it thoroughly. Once the shirt is dry, it is time to prepare the starch mixture. In a bowl, mix one tablespoon of starch with two cups of cold water. Stir the mixture until the starch is completely dissolved.
After preparing the starch mixture, fill a sink or basin with warm water and add the starch solution. Mix the solution well and soak the shirt in the solution for a few minutes. Once the shirt is thoroughly soaked, squeeze out the excess water and hang it on a hanger to dry for a few minutes.
In conclusion, proper preparation is key to achieving a well-starched shirt. By selecting the right starch, gathering the necessary supplies, and preparing the shirt and starch mixture correctly, you will be well on your way to achieving a crisp, professional look.
Starching Techniques
Starching a shirt is a great way to keep it looking crisp and professional. There are several techniques for starching a shirt, including spray starching, dip starching, and laundry sizing.
Each method has its own advantages and disadvantages, and the choice of method will depend on personal preference and the type of fabric being starched.
Spray Starching Method
Spray starching is a convenient and easy way to starch a shirt. Simply spray the starch onto the fabric and then iron the shirt.
This method allows for precise application of the starch and is ideal for fabrics that require a light to medium starching. It is also a good choice for those who prefer not to soak or submerge their clothing.
To use spray starch, shake the can well and hold it about 6 inches away from the fabric. Spray the starch evenly onto the fabric, making sure to cover all areas. Iron the shirt immediately after applying the starch, using the appropriate heat setting for the fabric.
Dip Starching Method
Dip starching involves soaking the shirt in a starch solution before ironing. This method provides a heavier starching and is ideal for fabrics that require a more substantial starching, such as cotton or linen.
Dip starching can also be more cost-effective than spray starching, as it allows for multiple shirts to be starched at once.
To dip starch a shirt, mix the starch with water according to the package instructions. Submerge the shirt in the solution and let it soak for several minutes.
Remove the shirt from the solution and wring out any excess starch. Iron the shirt immediately, using the appropriate heat setting for the fabric.
Laundry Sizing as an Alternative
Laundry sizing is an alternative to traditional starching methods. It is a liquid product that is added to the final rinse cycle of the wash. Laundry sizing can provide a light to medium starching and is ideal for those who prefer a more subtle effect.
To use laundry sizing, add the product to the final rinse cycle of the wash according to the package instructions. Once the shirt is dry, iron it using the appropriate heat setting for the fabric.
In conclusion, there are several techniques for starching a shirt, each with its own advantages and disadvantages.
The choice of method will depend on personal preference and the type of fabric being starched. Whether using spray starch, dip starch, or laundry sizing, following the instructions carefully will ensure the best results.
Ironing After Starching
Once the shirt has been starched, the next step is to iron it. Ironing helps to set the starch and give the shirt a crisp, professional look. In this section, we will discuss how to iron a shirt after it has been starched.
Setting Up the Ironing Board
Before ironing, it is important to set up the ironing board properly. Start by adjusting the height of the board so that it is at a comfortable level.
The board should be set up in a well-lit area with enough space to move around comfortably. It is also a good idea to cover the board with a clean, smooth cloth to prevent any residue from sticking to the shirt.
Ironing Different Parts of the Shirt
When ironing a shirt, it is important to start with the collar. Lay the collar flat on the ironing board and iron it from the middle outwards. Next, move on to the cuffs. Unbutton the cuffs and lay them flat on the ironing board. Iron the cuffs from the inside outwards.
After ironing the collar and cuffs, move on to the sleeves. Start by ironing the top of the sleeve near the shoulder and work your way down to the cuff. Be sure to iron both sides of the sleeve.
Once the sleeves have been ironed, move on to the yoke and body of the shirt. Iron the yoke first, then move on to the body of the shirt, starting from the top and working your way down.
Achieving a Professional Look
To achieve a professional look, it is important to pay attention to the details. Use the tip of the iron to iron around buttons and buttonholes.
Be sure to iron any creases or wrinkles out of the fabric. When ironing, use a back-and-forth motion, rather than a circular motion, to prevent any wrinkles from forming.
In conclusion, ironing a shirt after it has been starched is an important step in achieving a crisp, professional look. By following these tips and techniques, you can ensure that your shirt looks its best.
Caring for Starched Shirts
After starching a shirt, it is important to take proper care of it to maintain the crisp and polished look. Here are some tips to help you care for your starched shirts:
Washing and Drying Considerations
When washing starched shirts, it is recommended to use a gentle cycle and cold water to prevent the starch from breaking down. It is also important to avoid using fabric softeners or bleach as they can damage the starched finish.
After washing, hang the shirt on a hanger to air dry. Avoid using a dryer as the heat can cause the starch to break down and the shirt to lose its crispness.
Storing Starched Shirts
When storing starched shirts, it is best to hang them on a hanger in a closet. Avoid folding the shirt as it can cause creases and wrinkles, which will ruin the starched finish. It is also important to keep the closet well-ventilated to prevent moisture buildup, which can cause the starch to break down.
When to Use Dry Cleaners
If the care label on the shirt recommends dry cleaning, it is best to follow those instructions. Dry cleaning helps to maintain the starched finish and prolong the life of the shirt. However, if the shirt is only slightly soiled, it can be laundered at home following the washing and drying considerations mentioned above.
By following these simple tips, you can maintain the crisp and polished look of your starched shirts for a longer period of time.

Tips and Tricks
Preventing Wrinkles and Stains
To prevent wrinkles and stains on a starched shirt, it is important to take some extra precautions. First, make sure the shirt is clean and free of any dirt or sweat stains before applying starch. This will help ensure that the starch adheres evenly to the fabric.
Second, avoid over-starching the shirt, as this can cause the fabric to become too stiff and actually increase the likelihood of wrinkles. Instead, use a light to medium starching for a more natural look.
Finally, hang the shirt immediately after ironing to prevent any wrinkles from forming. If you are traveling with a starched shirt, consider packing it in a garment bag to protect it from wrinkles.
Starching Delicate and Synthetic Fabrics
When starching delicate or synthetic fabrics, it is important to be gentle and use a light touch. Cotton and linen fabrics can handle a heavier starching, but delicate fabrics like silk and wool require a lighter touch.
To starch delicate fabrics, consider using a starch spray instead of a liquid starch. This will help prevent the fabric from becoming too stiff or damaged during the starching process.
For synthetic fabrics, it is best to avoid starching altogether, as the starch may not adhere properly and can actually damage the fabric. Instead, consider using a fabric softener to help maintain the fabric's appearance and texture.
Maintaining Crispness Over Time
To maintain the crisp appearance of a starched shirt over time, it is important to take some extra steps. First, avoid washing the shirt too frequently, as this can cause the starch to break down and the fabric to lose its crispness.
Second, consider using a starch spray to touch up the shirt between washings. This will help maintain the shirt's appearance and keep it looking fresh and crisp.
Finally, store the shirt properly to prevent any wrinkles from forming. Consider hanging the shirt on a hanger or folding it neatly in a drawer to help maintain its shape and appearance.
Frequently Asked Questions
What are the best methods to starch a shirt at home?
There are several methods to starch a shirt at home. The most common method is to use a starch spray or liquid and iron the shirt. Another method is to make a starch solution and soak the shirt in it before ironing. Some people also prefer to use a homemade starch solution made from cornstarch.
What types of starch are recommended for clothing?
There are different types of starches that can be used for clothing. The most popular types are cornstarch, potato starch, and rice starch. These starches are safe to use and will not damage the fabric of the clothing.
How can I effectively starch a shirt collar?
To effectively starch a shirt collar, it is recommended to use a starch spray or liquid. Apply the starch to the collar and iron it until it becomes stiff. Another method is to use a collar stay to keep the collar in place.
What are the benefits of starching clothes?
Starching clothes can provide several benefits. It can help to keep clothes looking crisp and neat, and prevent them from wrinkling. Starching clothes can also make them easier to iron and can help them to last longer.
Can cornstarch be used as a starching agent for clothes?
Yes, cornstarch can be used as a starching agent for clothes. It is an effective and inexpensive alternative to commercial starches. To use cornstarch as a starching agent, mix it with water to create a paste and apply it to the clothing before ironing.
Is it possible to starch clothes without using an iron?
Yes, it is possible to starch clothes without using an iron. One method is to make a starch solution and soak the clothing in it before hanging it up to dry. Another method is to use a starch spray or liquid and then hang the clothing up to dry.